Showing posts with label Upper FWD Fuselage. Show all posts

Tuesday, June 2, 2020

Section 35 Upper FWD Fuselage Air vents

RV14 Build May 21- 31

Upper FWD Fuselage

Since I was using Pro-Seal on the upper skin to attach doubler I decided I should work on the air vents as they needed some too. I decided to stop short of installing them because the avionics subframe isn't riveted on yet and it looked like the air vents might get in the way of doing this.

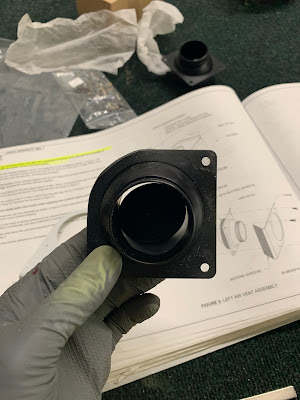
I started by lining up the airvents with the brackets to match cut the outside line
RV14 Build

I thought this would be hard, but it turns out the bracket around the metal vent is still plastic and the Dremel cut it no problem and the Scotch-Brite wheel finished off the shape.


RV14 Build

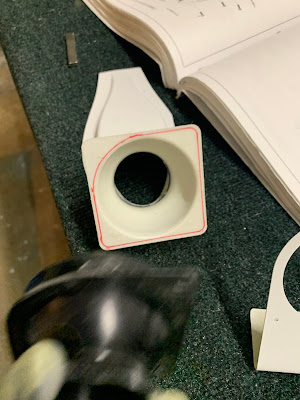
Then I traced the line onto the NACA vent and but the grinding wheel to take off the material.
Rv14 Build

This is where I ran into troubles. The plans say to make sure everything sits flat against the skin so i checked it on my tool box.

You can see its definitely not flush.

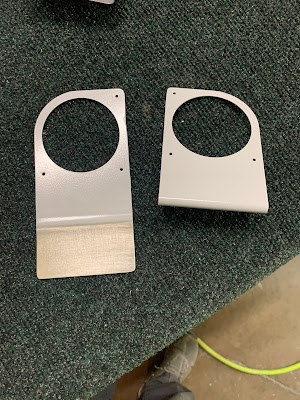
I emailed Vans about this and turns out the NACA vents were out of spec and they are sending me new ones. Well before I got this word back I decided I would jut re-bend the forward metal brace to the size of the NACA vent. It was about 1/8 off.

So I bend the flange flap and used my impact hammer to flatten it our as much as possible. I did draw a bend line where the old bend was first so I could use it a s a reference for my bend.

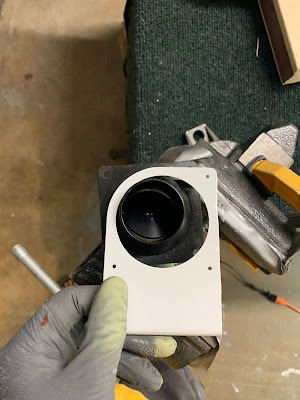
I don't have a metal bender so I clamped it into a vise and used a piece of wood to bend it and a hammer to sharpen the bend where needed.
Rv14 Build

Looks like I nailed it

Then I Pro-Sealed the surface between the NACA vent and the air vent, screwed it together to cure. Right about here is when I got the email that Vans was going to send me the correct spec NACA vents. O well I guess ill have spares for the future now.

2 Air vents done and ready to install.

Upper FWD Fuselage 3.0 Man hours


Monday, March 30, 2020

Section 35 Upper FWD Fuselage

RV14 Build March 20, 29, 31, April 1 &2

Section 35 Upper FWD Fuselage

I needed to assemble the rest of the FWD Fuselage.


Admittedly for the seemingly little work this should have been it was kind of a pain. The top strip didn't want to line up and fluting was not going to help that.

Finally with clekoes, some fluting, and brute force I was able to line everything up.

 Installing the nut plates.

I had decided that I wanted the upper longeron top coated, so I painted before installing the Upper FWD Fuselage. After talking with Liz I decided to topcoat the parts of the upper fuselage that you will be able to see when the canopy is tipped up. So time to install it.

You can see the upper fuselage installed in the right of the picture already.

Pro Sealing the gab between the upper longeron, skin, and canopy frame seat.


I was a little annoyed about how Vans calls out pro-seal randomly during the build because these tubes are not cheap and I hate to only need a little and waste the rest. But this job uses 2/3 of a tube.

Liz helping mask with tape the areas I don't want to topcoat!

 Pop rivets installed.

After the cabin was top coated I continued on section 35. Working on the canopy emergency release.

I wasn't sure how to do this, I tried the band saw... Not great. Then I measured out the cuts on tape and used a dremel cutting wheel.

Tape on the tube after measuring, before the cut.

Cutting the tubes.

 Trimming and grinding the release pins. I used the Scotch-Brite wheel to grind.

Release mechanism test fit.

Measuring the cowling hinges.

 There are small canopy latch skin doublers, I over countersunk one and then decided I could fabricate my own replacement. The un-primed one is what I ended up with. After researching what this does, I dont think I made the 2 small openings square enough so I ordered a replacement.

Clamping the cowling hinge for drilling.


 I was a little more reckless with the side hinges when I drilled them and they are not perfectly straight. I for see this being a pain when Im trying to install and remove the cowling. So I took all the time I needed to get this one as straight as possible.

Counter sinking the upper longeron after match drilling the skins. The cage doesn't sit well so I help it back and kind of free handed it, tested with a rivet (you can see in the 3rd hole) finished with a hand tools when I was close.

Dimpled the rest of the sub structure.

Countersinking the hinges.

The curved hinge was tricky so I had to be a little creative on how to hold the hinge while countersinking.

Primed the canopy hinges.

Had a rattle can issue. It stopped spraying, but I could tell it still had paint, so i punched a hole in it to drain the paint out after the pressure left and use my detail gun to spray the paint with.


Didn't have all the pressure out yet. Oops

Got it all figured out and sprayed in the end.


Upper FWD Fuselage 19.0 Man Hours


Thursday, March 5, 2020

Section 35 Upper FWD Fuselage

RV14 Build March 1-3

Section 35 Upper FWD Fuselage

I have been struggling trying to decide how much I want installed and completed before I topcoat the cockpit. Most people follow vans instructions and do it after section 32 the baggage area. I decided I wanted to build everything and see how it looks with it mocked in place before I decide when to topcoat.

Since I am going with the quick build wing this is the last major section...I think...of deburring, prepping, and priming. Gathering the parts is getting easier because there is almost none left!

This tab isn't in the plans to cut off, but according to vans it is using the the manufacturing of the part and can be cut off.

I etched and washed the parts at home. Just more comfortable.

Finished etching.

Getting ready to spray

Starting to assemble, this is very straight forward. 


The plans called for a pop rivet on one of the nutplates, but i was able to get a squeezer on a solid rivet.

Back riveting the map box frame onto the subframe.

Dimpling and riveting on the nutplates.

Nutplate done, I noticed I missed a rivet looking at these pictures. Ill get it.

Testing the skin fit to the subpanel.

The plans have you flute the upper flanges as needed to get the holes to line up. I only had 2 tabs on each side that really needed it.

Riveting on the sub structures.

Marking the holes not to rivet yet.

Looking good.

I temporarily installed the canopy hinge brackets, its 2 gold parts between the ribs, the plans have you do this a little later. But Im hoping since access is easy on the bench do it now and it wont cause more work later.

Clekoed her into place

Even after getting this mocked up Im still not sure If i want to install it now and then topcoat or topcoat first...

Moving on to the canopy decks while I think about it. This was straight forward rivet it in and match drill.

After I matched drilled both side.

Now you counter sink the longeron and dimple the canopy decks.

You can see the skin keeps the cutter cage from resting on the longeron flush so I had to use the hand tool to countersink all those holes in the end.

Then I installed the instrument panel attach brackets.  Almost done with this section!!

Uper FWD Fuselage 20.5 Hours


Before Start and First flight testing

 R14 Build August & September 21 Testing Getting into the fun stuf!! Putting gas in for the first time. Have the airplane up to get 15 d...