Monday, December 24, 2018

Rudder


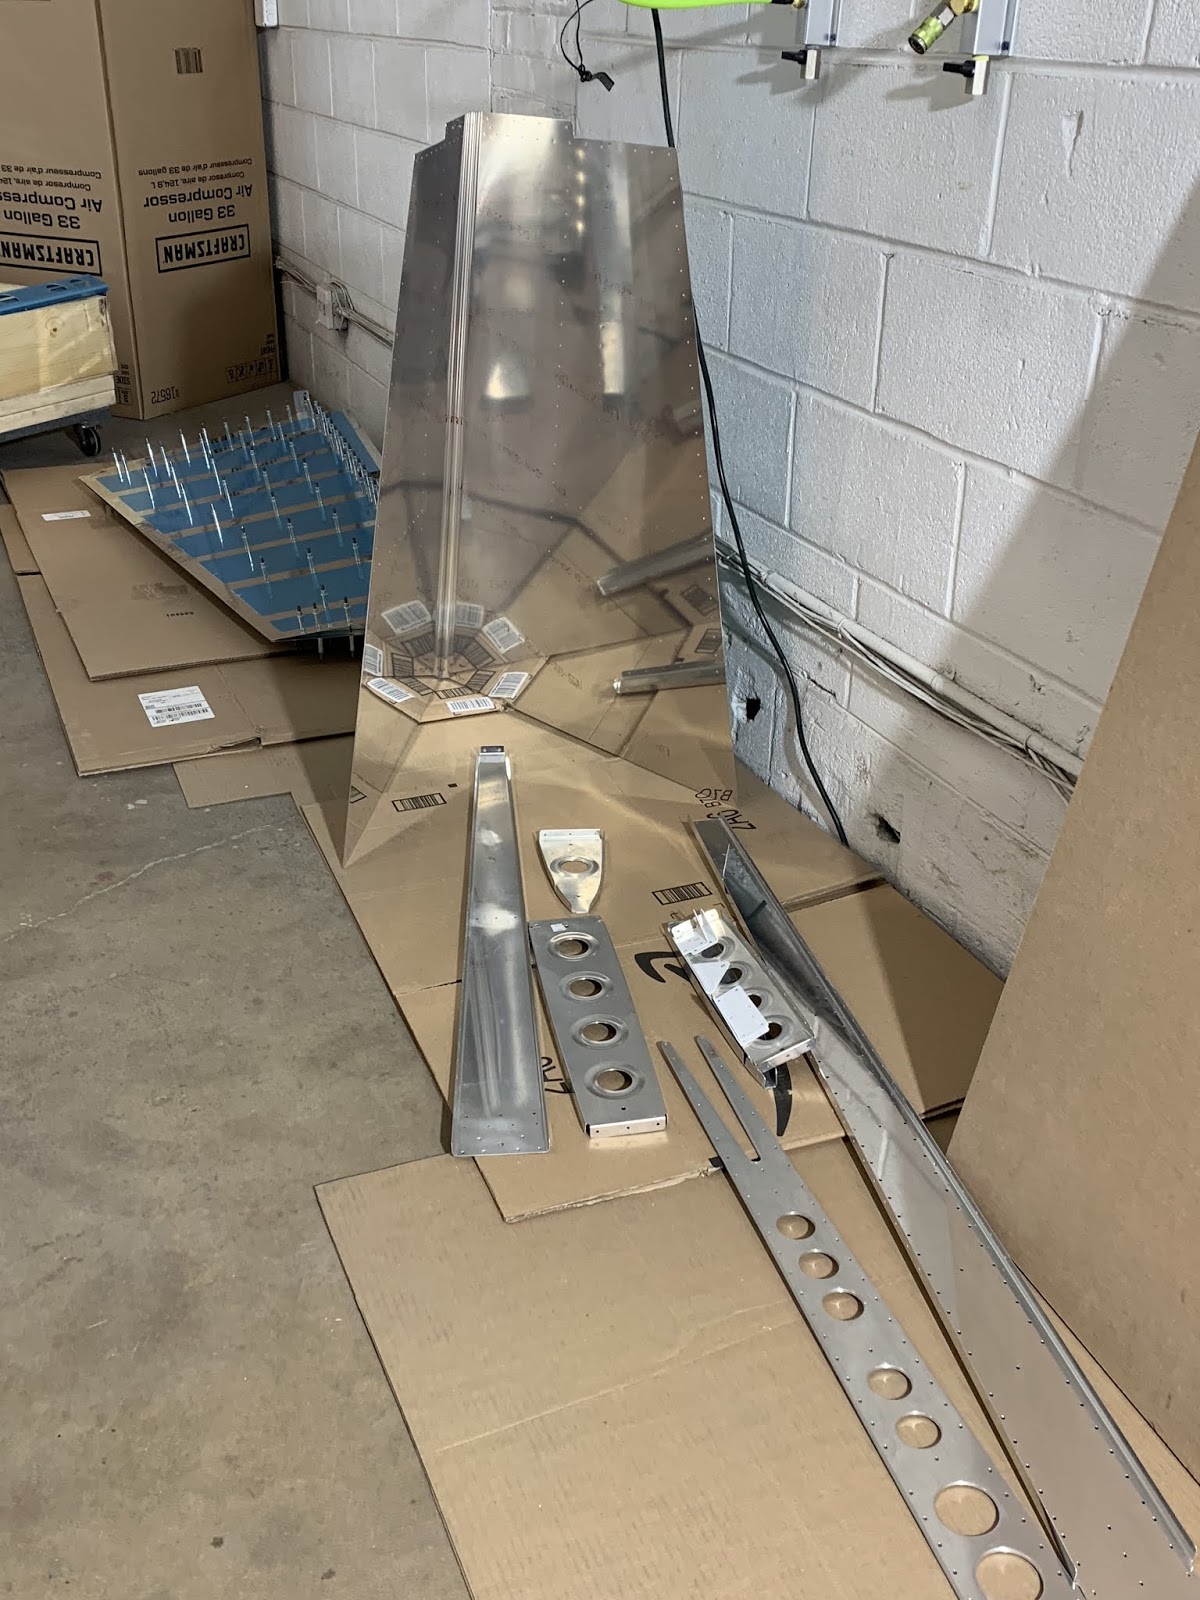
The plans say to final drill the rudder trailing edges perpendicular to the chord line of the trailing edge, but countersink them parallel to the angle on the trailing edge. I used the Trailing Edge JIG  from Cleveland tool and the drill press to drill perpendicular to the chord. This picture shows the scrap piece of the trailing edge in the Jig so I could practice and see how everything worked.

I then clekoed together the rudder so I could final drill the rudder skins using the trailing edge piece as a template.

After drilling a few of the holes I looked at the reverse side skins and noticed the holes where getting slightly enlarged. After thinking about it I decided to disassemble everything and use the #40 Reamer to final drill the skins and then deburr them. 


I bought a speed deburring tool to make the deburring go faster, it works great on all the big pieces. Since the rudder skins are so thin I decided to deburr them by spinning the bit in my hand so not over do it.


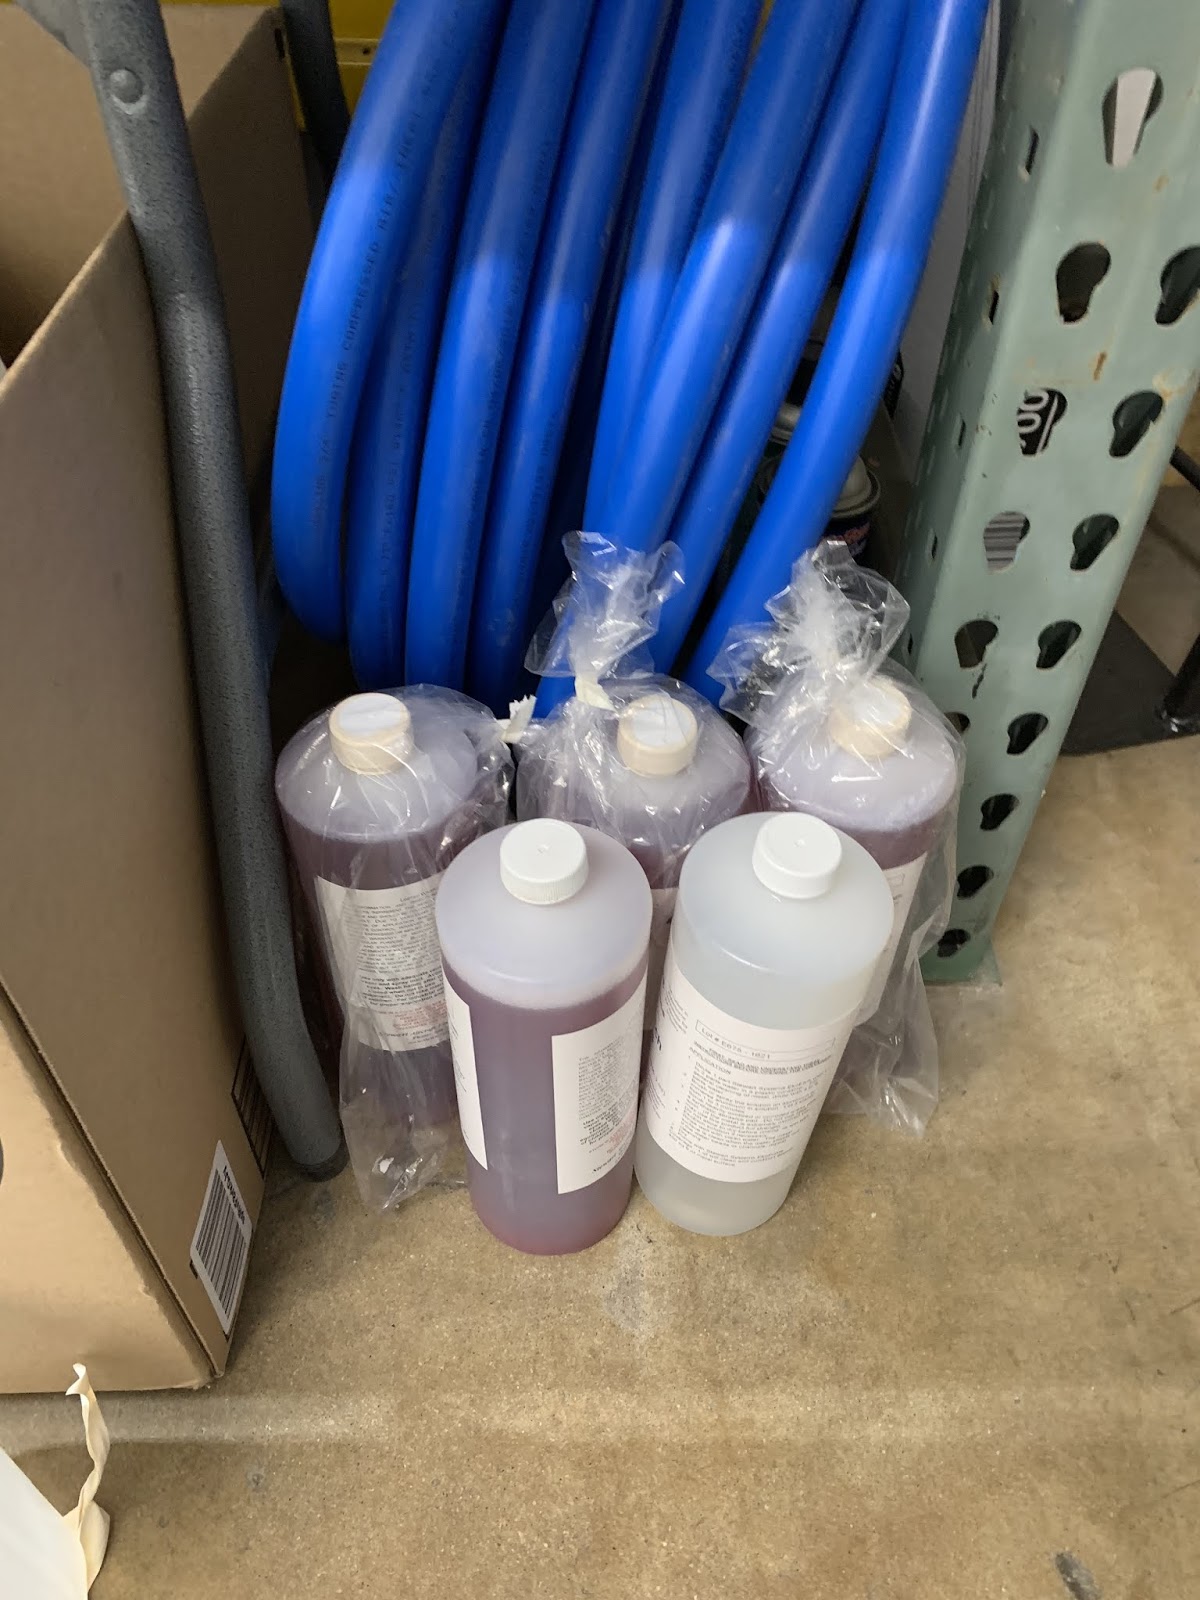
After I finished deburring all the pieces I set to work prepping for paint. This was the same process that I used on the VS. Clean, acid etch and scuff, clean, let dry. Bill stopped by to help out with this.


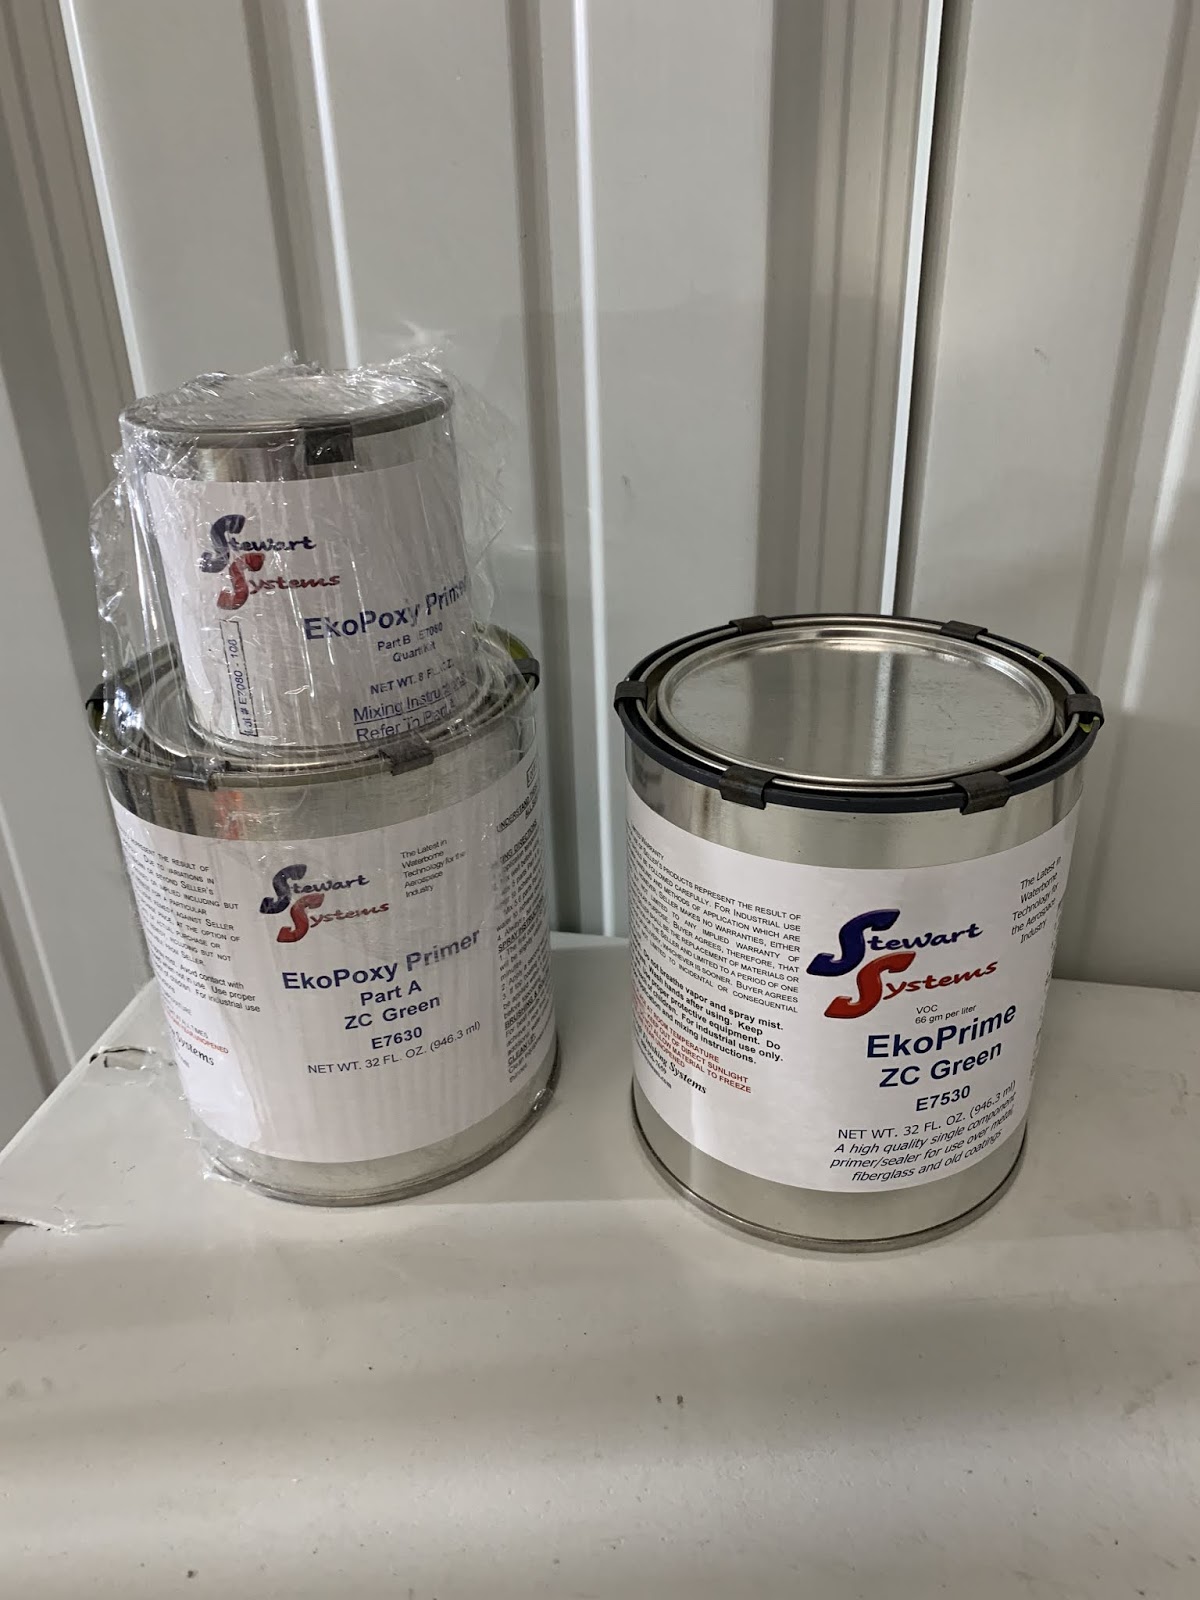
This time I decided to Dimple before priming to see how that worked with the final assembly, I also went with the 2 part primer.

The 2 part primer was different. Part A was REALLY thick and chunky. I spent probably an hour on this day mixing and trying to break up the paint chunks and get everything to a smoother texture. I did add some distilled water, that seemed to help a ton. I wasn't able to get everything mixed to a perfect consistency, but it was close enough where I felt safe especially since I was going to pour it through a paint filter.

The Part A and Part B diluted 3/4 parts with distilled water, When I poured it through the filter into my paint gun I still had lots of chunks of paint. I picked up a paint mixer that I can put in the drill press and just let it mix paint for a few hours next time before I use the paint.


Got back into the paint booth! Before I primed I cleaned all the metal 1 last time with Rubbing Alcohol to remove and water residue or accidental hand marks. I try to not touch the parts after paint prep without gloves on, but my memory slips :) 

The 2 part primer sprayed a little better and didn't have as much overspray it seemed. I definitely need work on my painting skills. My overlaps and speed aren't even and that shows in the final product. i also way overloaded the spraying tray and was getting overspray on pieces I wasn't trying to, also the pieces were so small and light the paint gun would blow them around and they would hit each other and mess up the finish. Lots of lessons learned this time around. 1. Mix the paint a few days before spraying to make sure its ready 2. Prime fewer pieces at a time 3. When spraying small pieces hold them in your hand and spray half, when it drys a bit spray the other half.


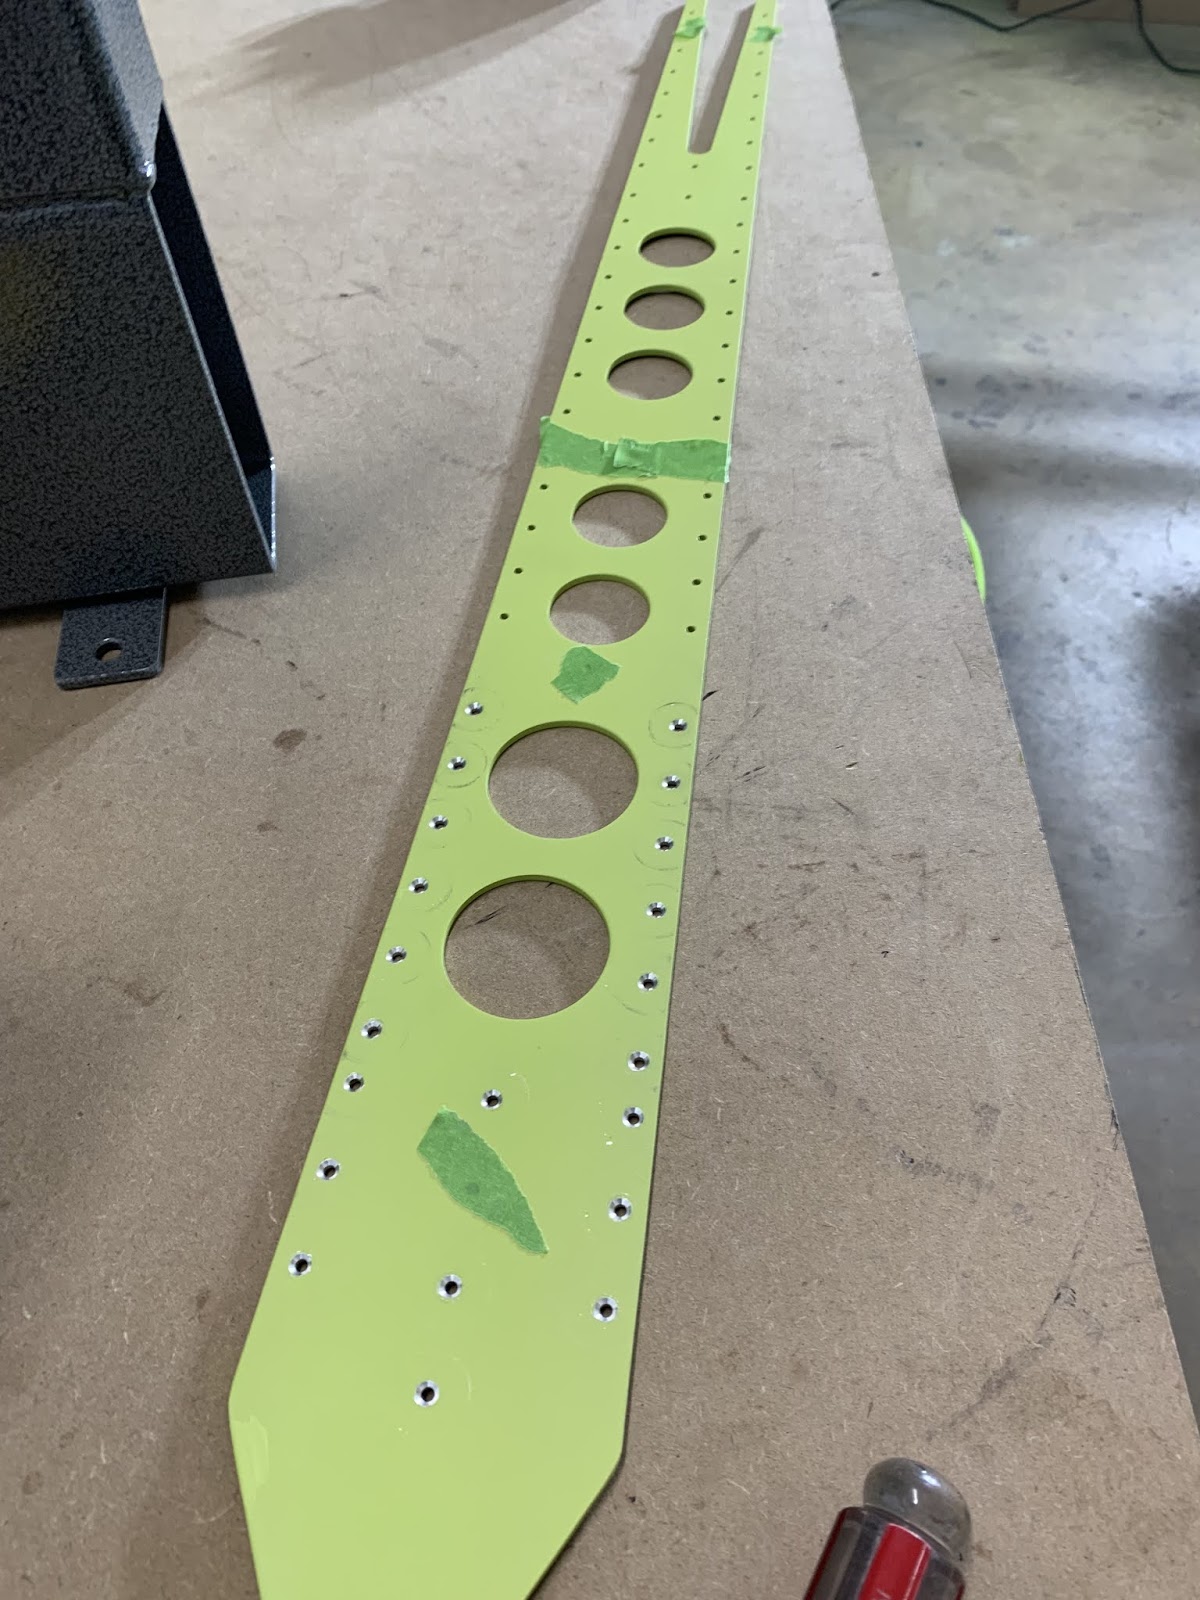
Started to assemble the Rudder! Started with the front spar and ribs. I really wanted my pneumatic squeezer to set the rivets, but I just can't get it to set the larger 1/8" rivets???! Another call to Cleveland Tools might be needed. Before I started to rivet I countersunk the trailing edge piece, I used the Jig again and it worked great.


Next I started to rivet the rear spar and ribs together. I need more practice still riveting, I had to drill a few out. Finally I realized trying to hold the pieces, rivet gun, and bucking bar at the same time was stupid and started to clamp the pieces in my Vise. I started with the reenforcing brackets then worked on the bottom assembly.


Im very happy I realized I can use the Vise to hold the parts for riveting, BBBUUUUUTTTT I'm not happy that I bought the cheapest vise and on the bottom side it has strange parts of the cast metal that hit my parts and shipped the primer off! Well, yet another learning experience in the books I guess. I used the single part primer to touch up the metal. It looks bad, but its internal and the main purpose it corrosion protection so it works. I read on somewhere "You don't get the airplane you want, You get the airplane you built" this is definitely proving to be true!
The finished rear spar and ribs. I never looks like much for the amount of work it takes, but progress! Am i right?


Today I started to put the stiffeners on the rudder skin....Did not go well, Right from the start I riveted 3 rivets to the skin without the stiffener in place???! I was in way to big of a hurry and my mind was not with me I guess. This should have been a sign to pack it in for the day and head home, because it was not the last of my mistakes. this is what I should have did.


I even prepped those pictures for the blog before I did this instead. Notice these 3 rivets that are done, but the lack of stiffener :( I drilled these out and the holes were a little deformed, but I re-dimpled and Im gonna go with it. I might rebuild the Rudder in the future if I keep making mistakes.


 This is what it should look like to back rivet. Put the plate on the table with the flush rivets into the skin and put a piece of tape on them to hold them in place. Flip the skin over and hit rivets with rivet gun.


This is where my second and third mistake happened. My back riveting plate is only so big, I got to one of the rivet that wasn't backed by the plate and hit it with the rivet gun. The EXTREMELY thin sheet metal of the rudder doesn't take kindly to that. Not only that, but I did it twice...Slow learner here. The edge of the back plate made a seam in the skin in both places. I gonna leave it for now, I think its something I work with high build primer in the future, or rebuild the rudder once my skills are better at the end of the project.


Finally got past all my struggles and finished one rudder skin.


I wanted to keep working, but it's Christmas Eve and I need to get ready for Church! Hopefully I can finish the Rudder this year.

Rudder 19.75 Hours


Vertical Stabilizer

Vertical Stabilizer

I finished riveting the VS on Wednesday and Thursday. I needed to finish up the rear spar now that I realized the 410 and 411PP brackets go on the rear side! Putting the brackets on proved to be a bit more of a challenge than I was expecting. It was a tight pit with the bucking bar and I ended up getting more practice drilling out a few rivets. Im having trouble with the pneumatic squeezer setting the larger 4-4 rivets, I called Cleveland Tools and got some advice, but it still doesn't seem to want to work correct for me. I'll need to keep working on this.
After I finished the brackets I put on the ribs. Again more of a challenge than I was expecting. I had to decide between holding the bucking bar in a tight location and having easy access for the rivet gun or the vise versa. I chose to have the bucking bar on the tight side. I need to get better at controlling the it when Im setting rivets. I am scratching my primer off :( But I worked through it and finished the VS frame!


Next I started to work on getting the frame into the skin so not to scratch the primer. I also taped over the holes that aren't suppose to be dimpled or riveted so I don't make that mistake.

I did accidentally dimple 2 holes in the skin that the plans didn't call for. I used the squeezer to undue this, not sure if that was a good idea or not? Time will tell.

Putting a flat set into the squeezer and letting it small the dimple back out seemed to work ok, the holes are enlarged now after all this and I do wonder about the skin cracking in the future from fatigue. 

Riveting the skin on actually was easier than I expected it to be, I was even about to get the squeezer to properly set the AD4263-3.5 rivets that is could reach around the edges! Finished the VS with the last pop rivets connecting the rear spar to the middle rib and called it done!


The little primer you see on the skin was a spot a got a good gouge in that I had to work out and it removed the pure aluminum layer at protects the metal from corrosion so I figured I would prime it to protect that spot until I need this in 2.5 years during final assembly. Maybe I should paint an animal on the tail like Frontier?
 Vertical Stabilizer 5.5 Hours

Monday, December 17, 2018

Rudder and Vertical Stabilizer

I got to the shop everyday last week! I feel like I made a ton of progress. I finished the rework of the Vertical Stabiler parts that I had to reorder, prepped, primed, and started final assembly. I also final drilled and mocked up the rudder. Also picked up a fe new tools!

Vertical Stabilizer
First I reworked the front spar and match drilled the ribs to it.

I started by straightening out the rear spar stiffener. I was a little skeptical about the method that Vans recommenced in Section 5 but it worked great, to well in fact. I clamped the VS808PP into my vise preloaded the 808pp by bending it in the direction i wanted to correct then I smacked it with a rubber mallet. Literally the first tool I remember my Grandpa using on a project, “The Persuader”! It worked a little to well and put a small bend in the other direction that I had to correct.

Then I began the work of demurring all of the edges.The Dremel tool worked great with a sanding disc wheel for the large lightening holes.

I decided after this assembly that my rivet hole deburring needed a tool to hold the bit, my hands started to cramp from holding the deburring bit and spinning it in all those holes, both sides.

I moved my bench grinder with the 6” Scotch-Brite wheel vertical so that I could run the edges of the larger skin pieces easier while using the bench to support the piece.

Here is all the pieces demurred! Now I just need to get to work on metal prep for priming.

Vertical Stabilizer Paint
The Stewart System primer sealer showed up this week so I started the process of metal prep and priming. I ordered the EkoPoxy and the EkoPrime both in ZC Green. I decided for the first assembly the EkoPrime would be fine since the only difference between that and the Poxy is that the Poxy is solvent resistant. I didn't think it was likely I would be cleaning the inside of my Vertical Stabilizer or Rudder with solvents in the future so the cheaper and easier, no mixing of parts required, EkoPrime would be the better place to start for my first HVLP painting.


I mixed the heavy duty degreaser, 1:10, and the acid etch, 1:2, with distilled water.

Fist I cleaned the parts with the degreaser rinsed them off with tap water and then sprayed on the acid etch rubbed it with red Scotch-Brite pads and let is sit for 3-5mins. I then rinsed the parts off with tap water and let them dry.


While the parts were drying I set up the paint booth and system. I had to build a painting stand with chicken wire and wood frame, Don't love it but it worked ok, set up the paint gun and measured out the primer. The paint gun I'm using is the Eastwood Concours LT, it comes with a 1.3mm tip and you can buy the 1.5mm and 1.8mm. I am also using the Devilbiss DeKups starter set to keep the gun clean up easier all I needed as the DPC11 Adapter.


The primer was mixed 10% with distilled water by weight, this was just to help it flow on better. I mixed up 9grams of primer and 1gram of water. That ended up being more than enough to prime all the parts of Vertical Stabilizer.


Set my pieces out, put on my protective gear and started to spray!

The primer went on well, I need to work on my technique going forward to get a better even coverage, but I’m happy with it for my first go.


The paint booth worked really well, the exhaust fan did a good job to move out the overspray. The primer did seem to fall out as a dust on the ground , which was unexpected and easy to clean up after.

Vertical Stabilizer Final Assembly
I meant to dimple and countersink before I primed, but forgot about that so I had to do it after. Turned out to not be that big of a deal for the dimpling, but the countersinking opens up the metal to the air again. Before I started to assemble I did a practice rivet, turns out I still know how to do that. Then my first rivet I over did and had to drill out! Turns out I still know how to do that too! For these first rivets I used the back riveting method instead of my squeezer because something I read on the forums about the squeezer deforming the thinner piece of the metal, not sure if there is anything to it, but back riveting definitely gives a great looking manufacturers head finish.


After I finished the front spar I did the countersinking on the 808PP doubler and flush riveted that to the rear spar. It wasn’t until know that I realized I needed to dimple the rear spar and now the 808PP double was in the way and wouldn’t let the dimple in, lucky I was able to the dimple between the spar and the doubler.


The plans say to use flush rivets to install the 411PP brackets but it didnt make sense since they never had to countersink the bracket. I had been working about 8hrs now without food and thought I had to be missing something and decided to do nothing until I could reach out to Vans about this one.

The plans have you install AN470 rivets with the manufactured head to the rear to keep as much room available to rivet on the skins. For some reason the 470 die wouldn’t fit into the squeezer on the side I needed to to get the squeezer around the flange so I had to shoot these rivets, I almost like shooting the rivets better than the squeezer since I can see the progress. I also need to get larger clamps since mine don't clamp much more than the tables edge.


Now that I’m reading the plans for the 470 rivets I notice the 411PP brackets are actual installed on the Rear of the spar so the flush rivets make way more sense now! I really need to bring food so I can think clearly!!

Rudder
While I was waiting for the primer to show up in the mail I finished the rudder final drilling and mock up except for the trailing edge, which I was waiting for my drill press to do.


I am having some issues with the rudder skins lining up well at the end of the counter balance area. It just feels really tight and I’m hoping the tension on the skins wont cause the skins to crack in the future. It already feels like the holes are getting bigger from just the clekos. The plans also have you make a lap joint on the left rudder skin so that it will ay flat after riveting. The lap joint I made lays flat on the top side but not the bottom, when I looked at the ribs behind the skin the bend on the ribs looks like its more flat on the top, which might be why the skins arn’t aging flat. I plan on trying to work these some more.


After I primed the VS I went to work setting up the Skil drill press and drilling the trailing edge piece for the rudder. The plans call for the holes to be final drilled 90 degrees to the cord line, the bracket from Cleveland tools makes this super easy.

I then installed the tailing edge and clekoed every hole. The plans call for you to match drill the skins and trailing edge starting in the middle and working out clekoing every hole with that same angle. I did a few holes then I stopped to think. I found in the forums the angle to the skin your drilling into is 84 degrees from the spar, but that means its 84 degrees from the trailing edge on the reverse skink. The skins are so thin i think it shouldn’t matter as long as the trailing edge piece is drilled correctly, which the jig made sure of, so I think I’m going disassemble everything and ream the skins to the final size individually. More thought on that needed.

Vertical Stabilizer 23.0 Hours, Rudder 1.0 Hour


Before Start and First flight testing

 R14 Build August & September 21 Testing Getting into the fun stuf!! Putting gas in for the first time. Have the airplane up to get 15 d...