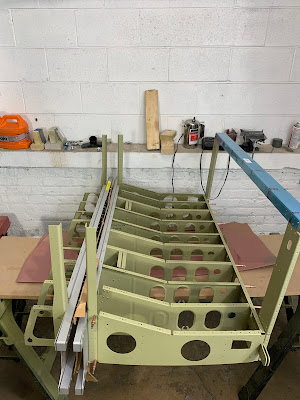
RV14 Build November 14-19
Now that everything is primed time to assemble. Admittedly I thought that this part would go without issue, but that didn't turn out to be the case. The lesson here, and its really hard to do, when you start to make mistakes you need to stop for the day. You can't power through it and it doesn't usually start to go your way.
Started out with seatbelt lugs and baggage rib assembly. These will turn out to be the problem in the future, I think because I put the primer on too thick and the holes didn't want to line up with the ribs and doubler to the spar.
Building the gear brace brackets. You have to countersink for a thicker skin and I was thinking maybe the standard practice of setting the countersink cutter to the proper depth for the rivet and then going 7 clicks, .007, deeper wouldn't be enough. I added a few clicks arbitrarily and after doing some research it seems the big threat is over counter sinking because you dont get good contact between the parts. They shouldn't lay flat when you put them together because the curve of the dimple radius is larger than the counter sink. not counter sinking enough doesn't negatively affect the strength of the bond.
Dimpling the skin and installing the skin stiffeners.
Installing the skin brace
Installing and riveting the MID Forward Lower Structure
Building the step attach assembly. I am going to put on the optional steps so I did the Tr-Gear only steps in this part. These where a little tricky to rivet together, really glad I had help.


Installing the step assemblies and the baggage ribs. This is where the trouble really came to a head. The rivets in the ribs didn't want to line up with the holes. With my riveting partner we where able to work through most of that, but after he had to leave I tried to rivet on my own and didn't get even pressure on the bucking bar and gun and pushed the skin out around the rivets shop head. I ended up drilling out the whole rib. Sanding and re-priming the areas that need it. Using the squeezer the flatten the metal back out. Then cleaning up the holes. The top hole in drilling out the rivet I drilled into the rib a bid, not all the way through, but enough where combine that with the minimal edge distance I was worried (start of the plan to repair IDK yet) so I build a doubler for the rib that Ill flush rivet to the aft side of the rib flange to reinforce that hole, The next hole down is too large now so I plan to drill that out to 5/32 and either put in a cherry max or a solid rivet.


Im not an engineer so trying to find out if using a cherrymax rivet in the second hole would work led me to the MMPDS handbook section 8. It looks like the strength of a driven 3/32AD rivet is 389lbs in single shear but multiplied by the sheet thickness factor is 374lbs, and the unit bear strength 411lbs so the single shear is limiting. The strength of a CR3213 5/32 in .032 thick material Yield strength is 375lbs. The handbooks says the yield strength is the shear to create a 4% nominal diameter change, since the rivet shear is 1030lbs the yield shear would be limiting. From what I can tell the unit bearing strength and the Yield Strength is the same thing.
Cherry Max
So that plan to repair is TBD but this is the plan. So section 26 is complete besides the 1 baggage rib needing to be installed and the baggage ribs need to be riveted to the skin, have to wait for Matt to get back for this!
MID Fuselage Lower Structure 28.5 Man Hours


