RV14 Build Rest of December
FWD MID FUSE Side Structure
Started to work on getting the 2 halves together and the side skins on. Match drilling the center section side plate and the upper drag fitting. I am going to do all the left side task and then the right just to keep my mind straight. There is A LOT of work in this section. Lucky my buddy Travis came into town end of the month and we crushed 2 huge days of work.
You'll need a long, I used 12", drill bit to reach some of these holes.
Deburred and primed
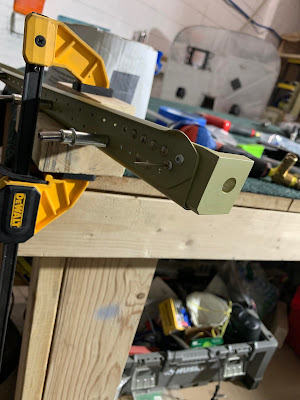
I wasn't sure how putting a twist in the upper longeron was going to go but it was rather straight forward. Making the wood blocks was my hardest task since I don't own a table saw, why don't I own a table saw?
Putting the piece in the clamp per the plans and twisting with the help of a digital level. To get a permanent 10 degree twist I really had to twist the thing almost around otherwise the spring back would take most of it out. I was happy at 10.48, it will probably spring back more in time
Match drilling the engine mount brackets
Riveting after priming. Cherry max rivets, easy enough pop rivet to install.
Lower Longeron Assembly
Upper Longeron Assembly
Made 2 attempts at riveting together the bottom fuselage skins, One of the first steps in drilling the the lower drag fittings to #20 and clekoing as you go for the cherry max rivets. I didn't have clekos that big. Thanks for stopping by Matt sorry it was a bust.
After I got the clekos in Travis stopped in for 2 days and we drilled and riveted the bottom skin. This is the Cherrymax that when into the bottom drag fitting that got the #20 drill. Unfortunately I drilled too far and nicked 2 of the lower drag fitting bolts and ordered new ones.
View of the bottom skin riveted together, we were cruising sorry i didn't get more pictures. The proud rivets are those same Cherrymax rivets that were drilled #20.
Travis working on the bottom skins.
Putting the bearing into the control column assembly.
Match drilling and riveting. You have to trim the front edge of the bearing to match the column edge. Turns out after installing this I didn't figure out the orientation of the column and trimmed to wrong edge. I was able to grind the bearing edge down after installing it though...Thankfully.
Putting the washer stack up and shims in is kind of a bitch. Im not sure I have it how I like, the plans say no side loading, it feels a little tight so Im gonna take out a shim. I used the plans washer stack up on one side of the column and installed the washers and an extra shim on each side of the bearing on the other end of the column.
Making the cowing hinges. After you drill these in place the plans never tell you to dimple the firewall flanges it just goes straight to riveting everything together. I emailed vans and they said to dimple the firewall flanges after you match drill and debur before you rivet. See the 2 pics below.
Firewall flange not dimpled?
Dimpled skin??
Made a "special" jig to hold the skins so we could rivet on the center section.
Skin is clekoed on and ready to rivet! Had to get in and make airplane noises.
Im thinking about scuffing the skin and stiffeners before riveting so the rivets wont tear apart the scotch bright. Im 90% sure Im going to use Stewart Systems EcoCrylic for the topcoat of the interior and it uses a mechanic bond...I thinking light gray. I know I know real original. I have no idea about the paint scheme so it will give me the most flexibility.
Well only the other skin to prep and rivet both on....So much to do still.
FWD MID FUSE Side Structure 48.5 Man Hours


No comments:
Post a Comment